Increase managed FortiAP’s with Fortigate 100D (and other models) Firewalls
With each built-in wireless controller in the Fortigate firewalls there is a max number of supported AP’s. By default this number is halved when you use tunnel mode (ie. all controllers tunnel back to an interface/captive portal on the Fortigate 100d’s). If you are using a central Fortigate/Fortigate HA Cluster as your controller it can be quite easy to go over 32 supported AP’s. By default the 32 number is a hard limit(on the 100D, larger devices have larger limits), whether you are using tunnel mode or not. In order to disable tunnel mode on your AP, thereby doubling your managed AP’s this is the process:
From the Fortigate’s CLI edit the controller config, edit your specific AP by Serial Number
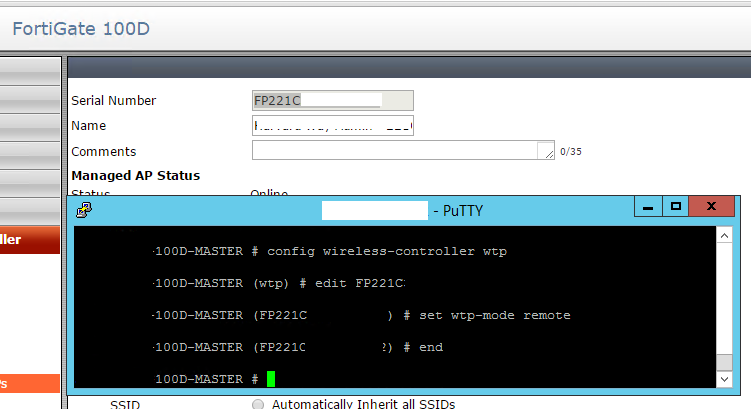
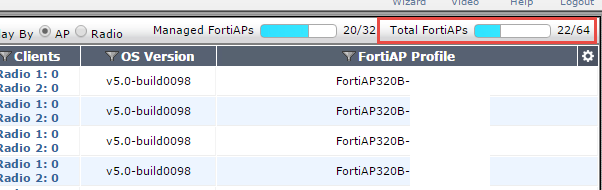
Type: “set wtp-mode remote” and type end. Now you should see the number of supported devices as increased:
Fortinet Guide: http://docs-legacy.fortinet.com/fos50hlp/50/index.html#page/FortiOS%205.0%20Help/wifi-ethernet_bridge.058.7.html
Mass import IP Subnets into Fortigate firewall
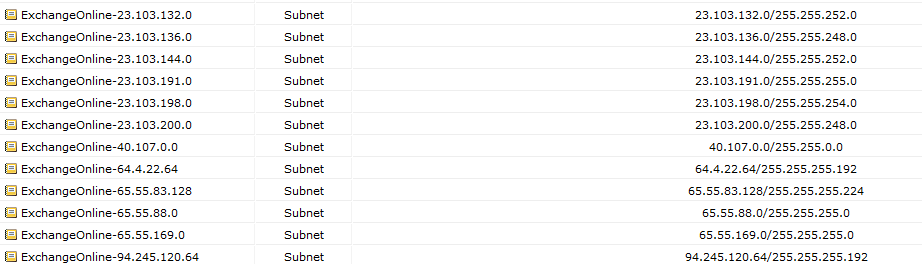
Recently, while working through an Office 365 Hybrid migration for a customer, we needed to bring the Exchange Online Protection IP address ranges into their firewall for policy changes. Microsoft publishes this list here: https://technet.microsoft.com/en-us/library/dn163583%28v=exchg.150%29.aspx. Unfortunately, I needed them in the following format:
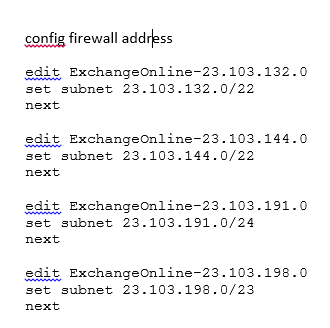
config firewall address
edit ExchangeOnline-23.103.144.0
set subnet 23.103.144.0/22
next
Thankfully, this was made much easier with using Word find/replace with the following syntax:
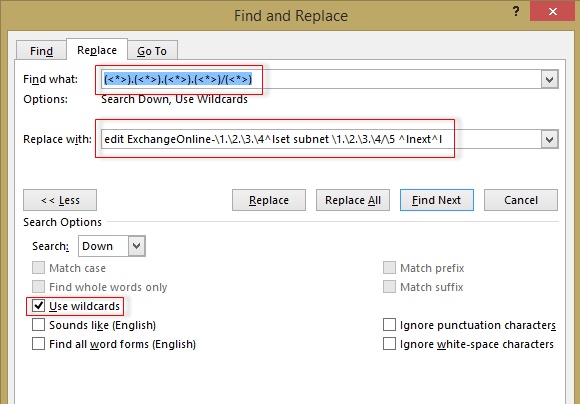
Find: (<*>).(<*>).(<*>).(<*>)/(<*>)
Replace: edit ExchangeOnline-\1.\2.\3.\4^lset subnet \1.\2.\3.\4/\5 ^lnext^l
Turns this:
23.103.132.0/22
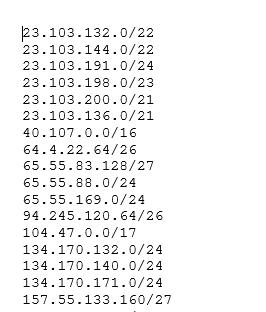
Into this:
edit ExchangeOnline-23.103.132.0
set subnet 23.103.132.0/22
next
Simply copy and paste into SSH, upload script, etc. and you’re sorted!
Bulk Fortigate configuration backup
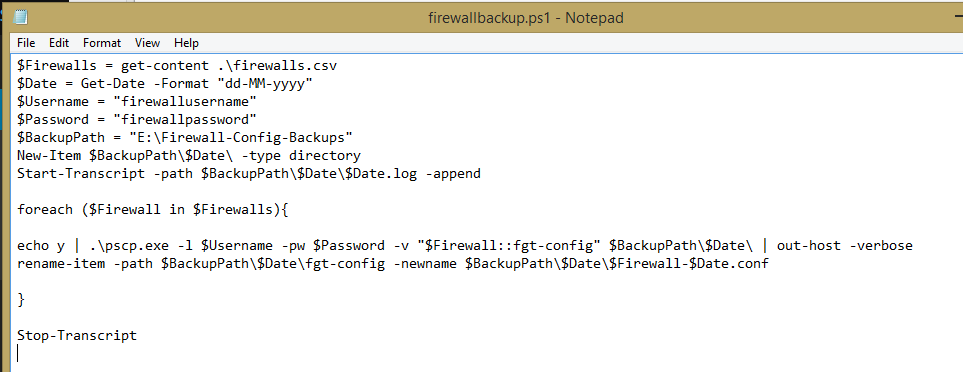
Continuing on from the previous post with bulk management of firewalls, in particular Fortigates. The following shows a basic script which after enabling SCP transfers on your device, utilizes pscp.exe to backup multiple Fortigate firewall configs.
This script gets the current date, creates a folder under your Backup Path with the date, connects to each firewall in your CSV file (just as the previous post) and uses pscp.exe to backup the config file (fgt-config). It then renames the fgt-config output file to the IP of your firewall and appends the date to the file name. I am utilizing the echo y command at the front of the command to accept the untrusted certificate error at first connection. In a production environment you may wish to re-evaluate this option!
Note, while the transcript option is present, due to a bug in PowerShell you do not get a whole lot of info out of running cmd applications from PowerShell. I’ll look at a work around for this and update in the near future.
————————————————————————————
$Firewalls = get-content .\firewalls.csv
$Date = Get-Date -Format “dd-MM-yyyy”
$Username = “firewallusername”
$Password = “firewallpassword”
$BackupPath = “E:\Firewall-Config-Backups”
New-Item $BackupPath\$Date\ -type directory
Start-Transcript -path $BackupPath\$Date\$Date.log -append
foreach ($Firewall in $Firewalls){
echo y | .\pscp.exe -l $Username -pw $Password -v “$Firewall::fgt-config” $BackupPath\$Date\ | out-host -verbose
rename-item -path $BackupPath\$Date\fgt-config -newname $BackupPath\$Date\$Firewall-$Date.conf
}
Stop-Transcript
————————————————————————————
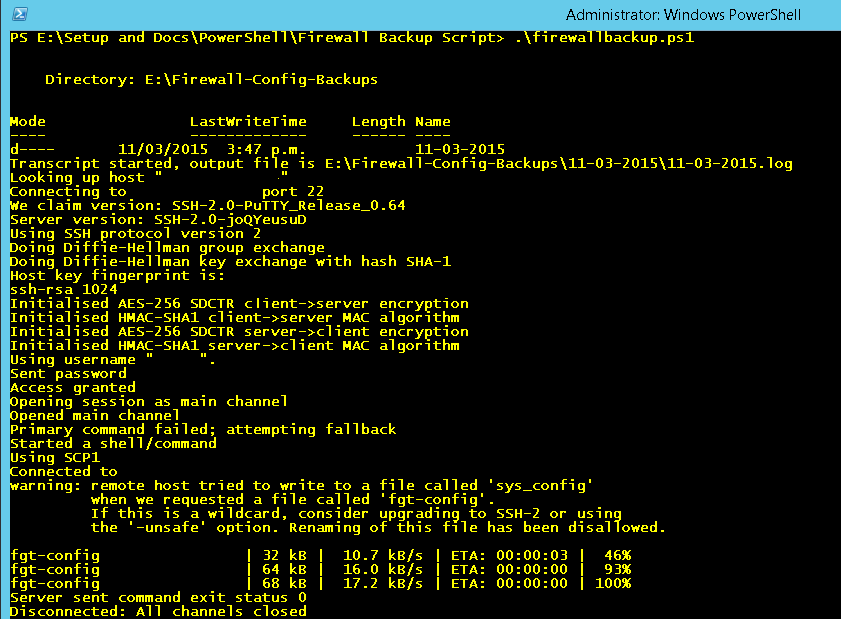
Here’s what your final screen output should look like:
Using Powershell for bulk SSH commands on Fortigate firewalls, etc.
I’ve been working with a customer with a large stack of Fortigate firewalls. Quite frequently there is a requirement to run commands against some or all of the firewalls. While config management can be performed via the FortiManager, after trialling it we realized there were simply too many limitations for their requirements. Thankfully bulk commands can be performed with this handy PowerShell SSH Module:
http://www.powershelladmin.com/wiki/SSH_from_PowerShell_using_the_SSH.NET_library. As an example, I’ve built a quick power shell script as an example of how this can be used.
1.) Populate a list of your firewall IP addresses in a CSV firewall called Firewalls.csv.

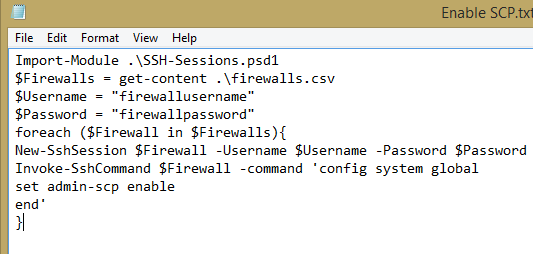
2.) Example: Enable SCP on Fortigate firewalls (to be used in a running config backups, etc.)
Import-Module .\SSH-Sessions.psd1
$Firewalls = get-content .\firewalls.csv
$Username = “firewallusername”
$Password = “firewallpassword”
foreach ($Firewall in $Firewalls){
New-SshSession $Firewall -Username $Username -Password $Password
Invoke-SshCommand $Firewall -command ‘config system global
set admin-scp enable
end’
}
Note: In a production environment you would want to a) Use Cert based authentication or b) Encrypt your User/Name password (or perhaps prompt for a credential when script is ran). It goes without saying – backup your firewall config before you make any changes! 🙂
In my next post I’ll cover using pscp.exe to backup your firewall config in a PowerShell script.
Install SSL Certificate into a FortiAnalyzer
We utilize a lot of Fortigate firewalls and have had really good success with them. The biggest downside, is there is no native reporting functionality built into them. For that we utilize a FortiAnalyzer device which provides really impressive, feature-rich reporting. While there is a large amount of functionality available from the GUI, adding an external SSL certificate for remote access to the device requires utility the CLI. Thankfully it is a pretty straightforward process:
From the CLI type: exec certificate local generate some.domain.com (whatever your external domain name is)
![]()
Next you will need to setup a local TFTP server (I use tftpd32, simple and straightforward) and run the following command:exec certificate local export some.domain.com 192.168.123.123 (the IP address of your local TFTP server)
![]()
Next, open your TFTP folder and you will find your CSR file.
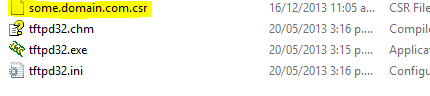
Open this file in your favorite text editor and copy and paste it into your cert request through your SSL vendor (Godaddy, Verisign, etc.). After domain authorization and receipt of your certificate, simply upload it via the same method:exec certificate local import some.domain.com.crt 192.168.123.123
![]()
Finally from the FortiAnalyzer GUI Console, browse to System Settings, Admin, Admin Settings & select the newly imported some.domain.com.crt certificate.

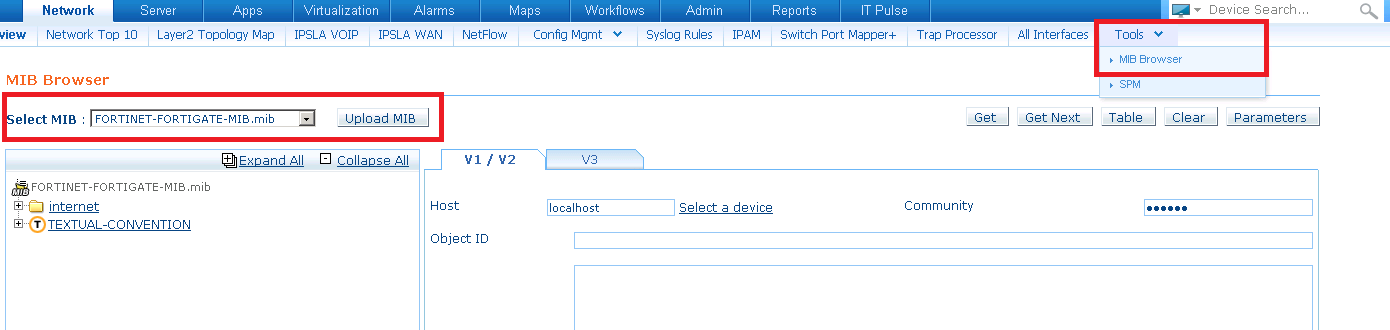
Upload Fortigate MIBs to OpManager
If you would like to monitor your Fortigate firewalls with anything other than the basic interface lists, ping latency, etc. in ManageEngine’s OpManager then you will need to install the Fortigate MIB files. There are two sets of MIB files I needed for the Fortigates we were monitoring. One is FORTINET-CORE-MIB.mib which sits under the root of the support.fortinet.com firmware FTP.
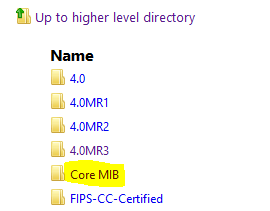
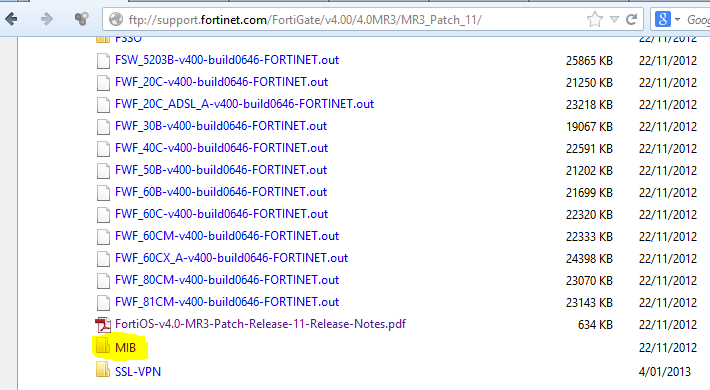
The other is located under the MIB folder on the same FTP portal under the specific patch of the Fortigate you are setting up.
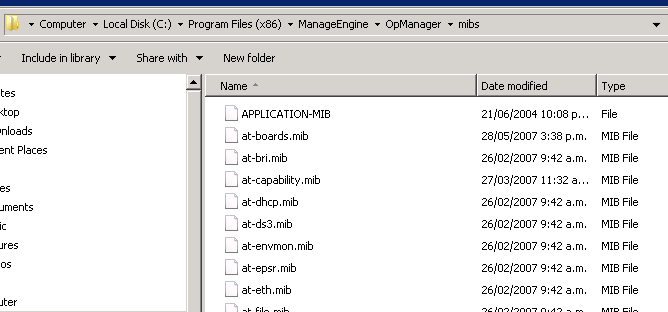
I noted several issues with corrupt copies of the default MIBs included with OpManager. Thankfully I was able to download replacements here: http://forums.manageengine.com/topic/opmanager-mib-repository-now-available-for-download-mibs-zip. The MIBS.zip file didn’t work but I was able to search for the specific corrupted files and download them to the OpManager MIB location in Explorer (C:\Program Files (x86)\ManageEngine\OpManager\mibs).
From there you can simply upload the MIBS via MIB Browser built into OpManager (Tools, MIB Browser).