Missing Remote Console option in vSphere Web Client
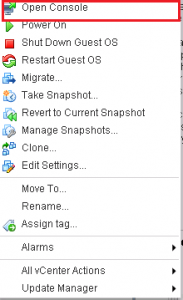
One of the great features in ESXi 5.x is the vSphere Web Client. It is very feature rich and is nice to have a web client front end for remote support, etc. We recently received a call from a customers external vendor who couldn’t bring up the web console. I checked their permissions and confirmed they had access to the VM they needed to work on. They could perform virtual machine functions but there was simply no option available for remote console.
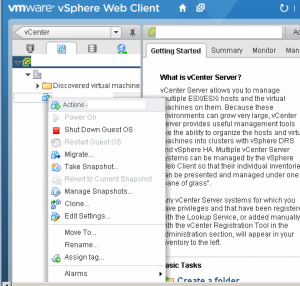
Remoted to their system and noted that the Client Integration Plugin was not loaded.
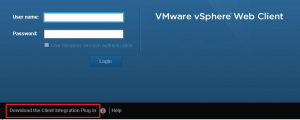
Downloaded and installed, logged in and confirmed Remote Console was now available and operational.
Install SSL Certificate into a FortiAnalyzer
We utilize a lot of Fortigate firewalls and have had really good success with them. The biggest downside, is there is no native reporting functionality built into them. For that we utilize a FortiAnalyzer device which provides really impressive, feature-rich reporting. While there is a large amount of functionality available from the GUI, adding an external SSL certificate for remote access to the device requires utility the CLI. Thankfully it is a pretty straightforward process:
From the CLI type: exec certificate local generate some.domain.com (whatever your external domain name is)
![]()
Next you will need to setup a local TFTP server (I use tftpd32, simple and straightforward) and run the following command:exec certificate local export some.domain.com 192.168.123.123 (the IP address of your local TFTP server)
![]()
Next, open your TFTP folder and you will find your CSR file.

Open this file in your favorite text editor and copy and paste it into your cert request through your SSL vendor (Godaddy, Verisign, etc.). After domain authorization and receipt of your certificate, simply upload it via the same method:exec certificate local import some.domain.com.crt 192.168.123.123
![]()
Finally from the FortiAnalyzer GUI Console, browse to System Settings, Admin, Admin Settings & select the newly imported some.domain.com.crt certificate.
Mass import PSTs into Exchange Database/Archive Database
We’ve had a client recently implement Exchange 2010 email archiving due their users utilizing PSTs for archiving. After creating the archive database and specifying the users who would be utilizing it – the next problem was importing the massive list of PST files into their Archive DB without having to work with every user to import it. While you can utilize PowerShell to import PSTs into Exchange, because there was zero uniformity to their PST file names it would have been just as easy to work with every user… Thankfully Microsoft has a really handy utility that takes the pain out of it and best of all it is free! It can be downloaded here: http://www.microsoft.com/en-nz/download/details.aspx?id=36789
It allows you to map discovered PSTs to the users mailbox or archive database – it also allows you to migrate into Office 365/Exchange Online. Couple of pre-reqs for installing on your management sytem: .NET 4.5, Powershell 3, NOTE: If you receive an error when installing on Server 2012/2012R2, click here for a workaround. Outlook x64 (if running from a 64 bit system) & an Admin account with that can read AD and modify Exchange mailboxes. There are two components: PSTCapture.msi – this will go on your management system & PSTCaptureAgent.msi (or _x86) that will be rolled out to the workstations/servers hosting the PST Files
If your servers/workstations are running Windows Firewall, you will need to create an exclusion locally or a apply the exclusion via a GPO (ideally) for: “C:\Program Files\Microsoft\Exchange\PSTCaptureAgent\Microsoft.Exchange.PSTCapture.DiscoveryAgent.exe”
This exe runs as the service: Microsoft Exchange PST Capture Agent Service.
![]()
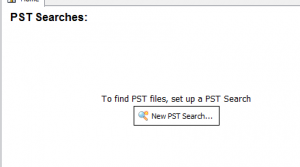
Once both components are installed simply create a “New PST Search” to go hunting for PSTs.
On the next screen you will see a list of your AD PCs & Servers. If you see the following here, I’d double check your firewall settings on both the server & agent, re-installing the agent if required.
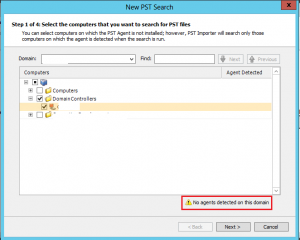
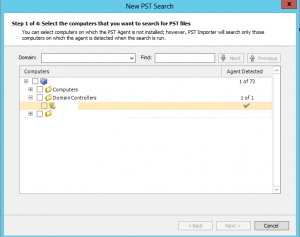
You should have a check box available next to any systems that have the agent running:
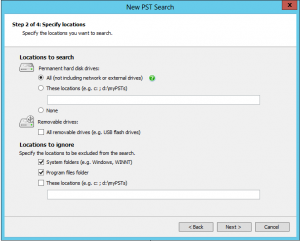
Select your include/exclude options, then next & next & finish.
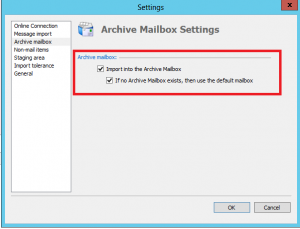
The other required option was the “Import into the Archive Mailbox” option under Settings if you are utilizing Exchange 2010+ Archiving:
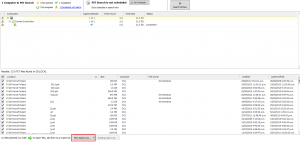
On the next screen, select “Search All Now” to begin the search for PSTs. Note: If clicking on the button doesn’t do anything, it is most likely due to the remote agents not communicating.

After the scan is complete, select your mailboxes New Import List and “On-Premise” (or online if migrating to O365).
On the next screen, specify the mailboxes each PST will be imported in to. You can select several and change mailbox at once if required. Then simply select “Imported Selected Files Now” when ready.
NOTE: If you receive the error: “Import error: Error opening mailbox” when processing, it could be do to a) Make sure your are using an account that has full mailbox access or b) You are running x64 Outlook if on an x64 system.
VMware Scan/Stage/Remediate Patching Fails
I was recently patching an ESXi 5.1 host received the following error when attempted to scan, stage or remediate the host:
![]()
None of the rest of the hosts in the cluster had any issues, so I assumed the issue was with the host. I then went and checked the Update Manager logs for further info. These logs are located under: C:\Users\All Users\VMware\VMware Update Manager\Logs. In the vmware-vum-server-log4cpp.log file in this folder. I search for error or warning in the text editor to look for potential issues. This led me to the following error: Platform Configuration Error: /usr/sbin/esxupdate returned no results, exit status: 1
![]()
I then searched Google and came across the following article for VMware: http://kb.vmware.com/selfservice/microsites/search.do?language=en_US&cmd=displayKC&externalId=2014538
Followed the steps listed in the KB:
To check if the vmsyslogd service is running, run the command:
ps | grep vmsyslogd
If there is no output, the service is not running.
To start the vmsyslogd service, run the command:
/usr/lib/vmware/vmsyslog/bin/vmsyslogd
To reload vmsyslogd , run the command:
esxcli system syslog reload
To verify that the vmsyslogd service is running, re-run the command:
ps | grep vmsyslogd
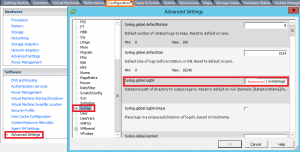
I discovered the following error in the syslog output after running esxcli system syslog reload command listed above:
![]()
From there, changed the path location for Syslog on the host, selected ok and was then able to scan(this was the actual issue)/stage/remediate the host!
vCenter Install – Failed to create database users.
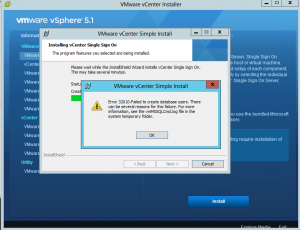
Recently installing vCenter for a customer and received the following error when installing vCenter’s SQL Component:
“Error 32010. Failed to create database users. There can be several reasons for this failure. For more information, see the vmMSSWLCmd.log file in the system temporary folder”
Open up your %temp% path and look for the VMMSSQLCmd.log file to see the cause of the failure. In this case: Password validation failed. The password does not meet Windows policy requirements because it is not complex enough.

Re-ran setup and selected a more complex password – install now completes successfully!
vCenter Service won’t start/Failed to create http proxy
I recently had a customer who’s vCenter service would not start on their management server. The Event 1000 error showed: “Failed to intialize VMware VirtualCenter. Shutting down…” Not very helpful!
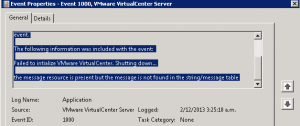
Next, I checked the vpxd log files: %ALLUSERSPROFILE%\Application Data\VMware\VMware VirtualCenter\Logs\. In there I noticed the following error: [VpxdReverseProxy] Failed to create http proxy: An attempt was made to access a socket in a way forbidden by its access permissions. This indicated that something was using one of the vCenter ports (By default 80,443,902).
The next step for this was to find out what was using one of those ports. For that, we use the netstat command: netstat -bano > C:\netstat.txt (I will generally output this to text file as it makes it easier to search).
![]()
Search the output file for the ports VMware Ports listed above (or the non-standard ports you may have configured).

To check what application is related to the PID, open Task Manager and add PID to the view (View, Select Columns)
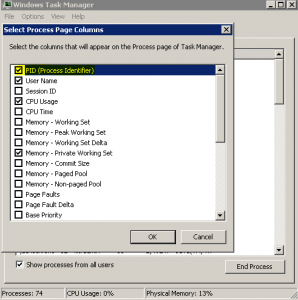
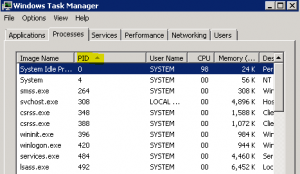
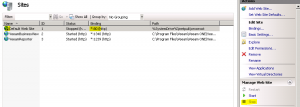
At this stage I had a pretty good idea what was using it. Jumped into IIS and sure enough, somebody had started the Default Website running on Port 80. Stopped the website and restarted the vCenter Service with no further issues


