
Migrate DHCP Server in Windows Server
Quite often we will have a requirement for migrating DHCP between servers. The process is very straightforward with 2008 & later servers. First, install the DHCP Role onto your destination server if it’s not there already. I find it easier to install this with PowerShell as opposed to Add Features as you don’t get all the prompts for setting scopes, etc.
From an elevated PowerShell, run Import-Module servermanager
![]()
Next, install the role: Add-Windowsfeature DHCP -IncludeAllSubFeatures
#This will include the RSAT/Management Tools as well as the DHCP Service
![]()
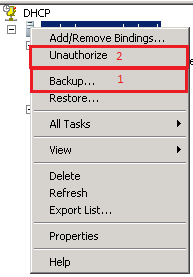
Next on your source server, right-click on your server and select “Backup”. Save the backup file to a shared location. Next select “Unauthorize” – this will allow you to authorize the migrated server.
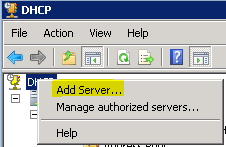
On the new server, open DHCP, add your new server into the management view
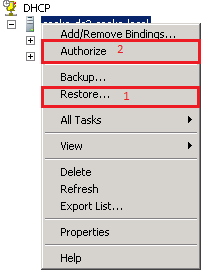
Next, right-click on your new server and select “Restore”, select the backup file from your shared location and import. Right-click on the new server and select “Authorize” and the server will now be ready to use.
Enabling Spanning Tree/STP on an HP Procurve Switch
Have had a couple of requests for setting up Spanning Tree on Procurve 2530 & 2920 switches recently. It’s extremely straightforward & can be done via CLI with Telnet or through the Web Management.
Under the web login(http://ipaddress), login with your manager (read/write) login at the top right corner of the screen. Expand Spanning Tree and Select Tree Management. On the right-hand side, select Change and select the box to enable. Save and you’re done

For the CLI, connect via Telnet to your switch IP address. Type in menu from the CLI to bring up the configuration menu.
![]()
Select option 2 for Switch Configuration on the 1st Screen.

Select Option 4 for Spanning Tree Operation from the next screen.
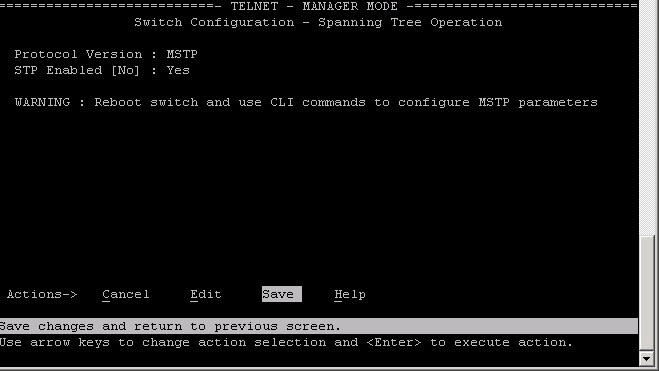
Select Edit and press Enter from the bottom menu, use your arrows to select STP Enabled & Space Bar to toggle the selection to Yes. Press Enter to go back to the Actions Menu and Select Save to save changes.
ESXi 5.1 Manual/Force Upgrade
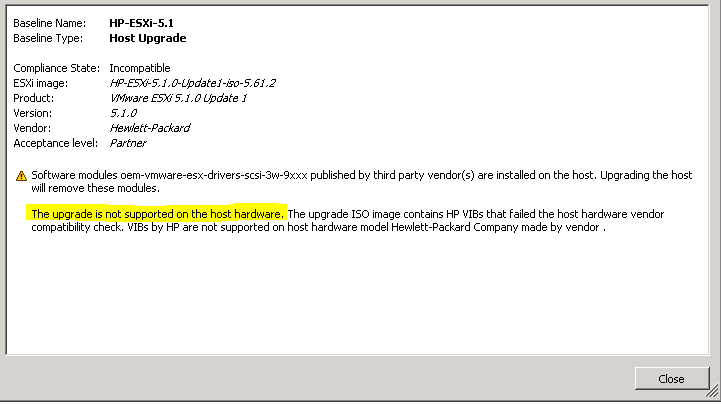
One of the great features of vCenter 5.1 is the ability to upgrade older 4.x ESX/ESXi hosts to 5.1 from within Upgrade Manager. This being said, I have had several recent deployments where this has not being an option due to perceived incompatibilities between installation media (both branded & unbranded) and the host. The other issue I have found is that the Update Manager method doesn’t automatically recognize the ESX/ESXi partition. Even after installing the latest host firmware(which I would highly recommended) and confirming it is on the compatibility list of supported hardware for ESXi 5.1 I still receive “The upgrade is not supported on the host hardware. The upgrade ISO image contains HP (or other vendor) VIBs that failed the host hardware vendor compatibility check. VIBs by HP are not supported on host hardware model Hewlett-Packard Company made by vendor.”
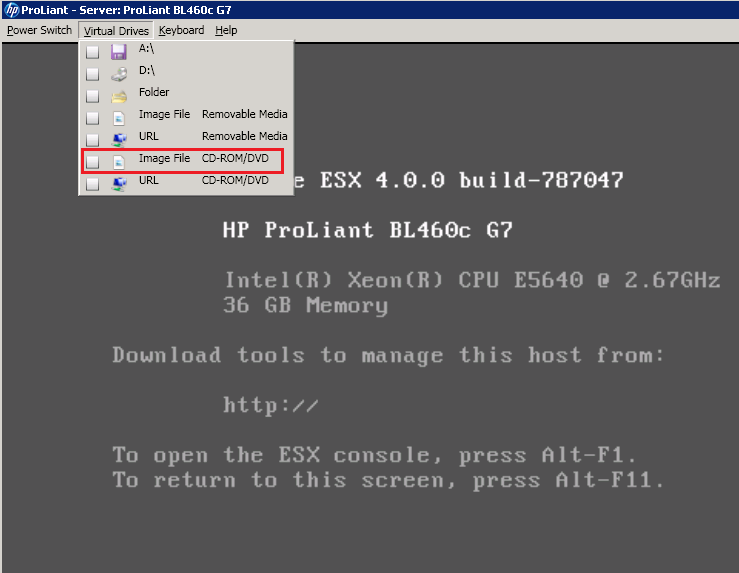
It is possible to customize your install image and add/remove VIBs as required but I have found the easiest way to resolve this is by doing a manual upgrade. This can be done be done directly from the host, or my preferred method – Out-of-Band Management, Dell DRAC, HP iLO, IBM AMM, etc.
Mount your VMware ESXi 5.1 media (or insert CD) and restart host.

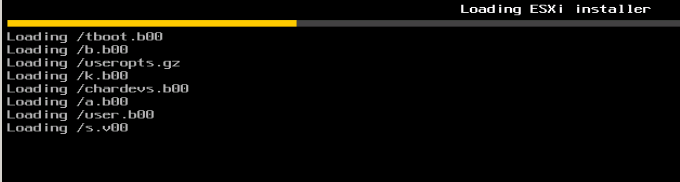
You will see the ESXI 5.1 Splash Screen which will continue to load the various modules

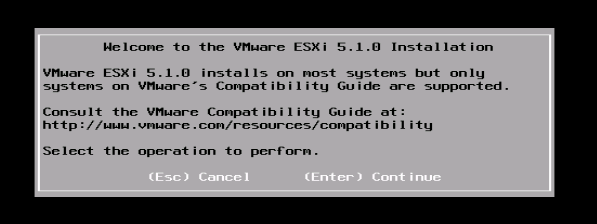
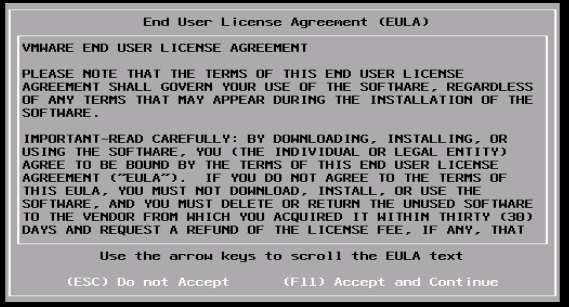
After all the modules load (Approx. 5-10min) you will be presented with the following install screen. Hit enter on your keyboard to continue past this screen & F11 to accept the EULA on the following.
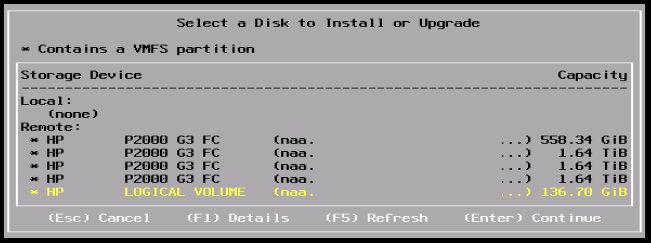
The installer then scans through available hardware and you are faced Disk selection option. Select your ESX/ESXi install volume and press Enter to continue.
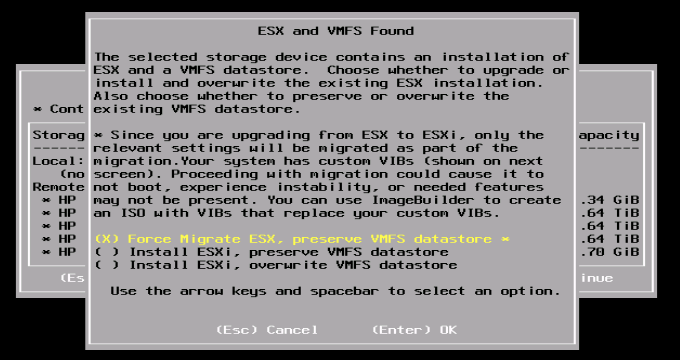
You are then faced with upgrade/install options. IMPORTANT: Do NOT select overwrite VMFS datastore unless you are prepared to lose all of your Virtual Machines or really enjoy restoring all of your data from backups… Select Force Migrate ESX, preserve VMFS datastore and Enter to continue. On the following screen you are asked to confirm. Hit F11 if you are happy to proceed

Depending on your hardware, after approximately 10-15min you should see a message indicating “Force Migrate Complete.” Select enter to reboot.

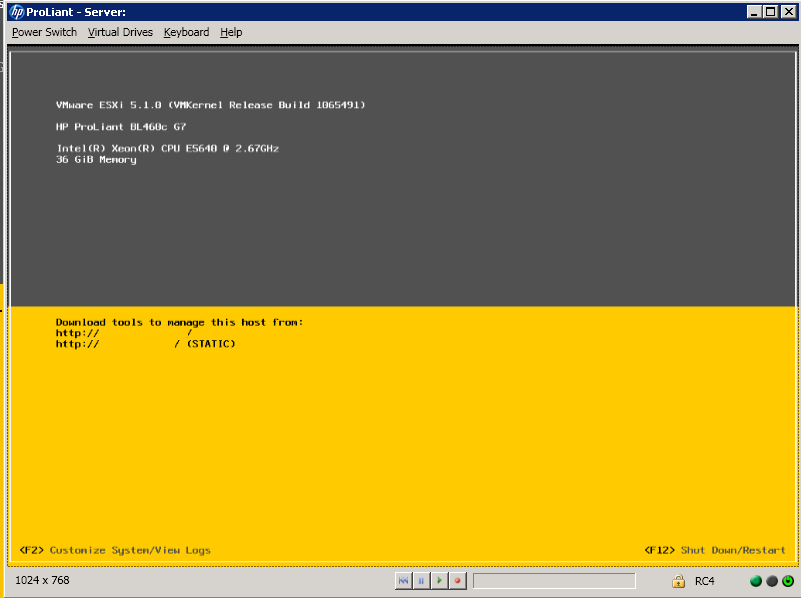
After couple of reboots you should find yourself at the VMware ESXi 5.1 splash screen and be able to access your host via vCenter 5.1.
![]()
Sharepoint HTTP Error 403/App Pool Keeps Stopping
I recently came across a SharePoint site that wouldn’t load. Received the following error when visiting with the SharePoint Team site, Central Admin page, etc.

I reset IIS which didn’t help. Confirmed the SharePoint sites were started but after checking the Application Pools, noted that they were both stopped.
![]()
Went ahead and started both but immediately found they had stopped again. After looking into the IIS App Logs, noted the following error: Application pool SecurityTokenServiceApplicationPool has been disabled. Windows Process Activation Service (WAS) encountered a failure when it started a worker process to serve the application pool.

There was recently a password change on the service account utilized for the SharePoint service. While the Windows services were up and running the App Pool identity needed to be updated. The fix for this is to go to the Advanced properties of the App Pool, either by right-clicking on the App Pool of from the Application Pool Tasks on the task pane.

Under “Identity” select the ellipsis to the right, and “Set” under custom account and enter your new account or updated password details.

Once updated, your should now be able to start your App Pool and have it stay running!
![]()
vCenter “Host currently has no management network redundancy”
We recently had an IBM Blade environment where the HA Heartbeat/Management network were sharing the same NIC due to hardware constraints. This will cause an alert warning in vCenter.


Ideally, you would be best to add a second NIC to the management VMkernel Port, either with NIC teaming or in standby. If you are aware of this but would like to suppress the message anyway, take the following steps:
Right-click on your HA cluster in your vSphere Client, select “Edit Settings”

Click on vSphere HA & select “Advanced Options”, add the following line:
Option: das.ignoreRedundantNetWarning
Value: true
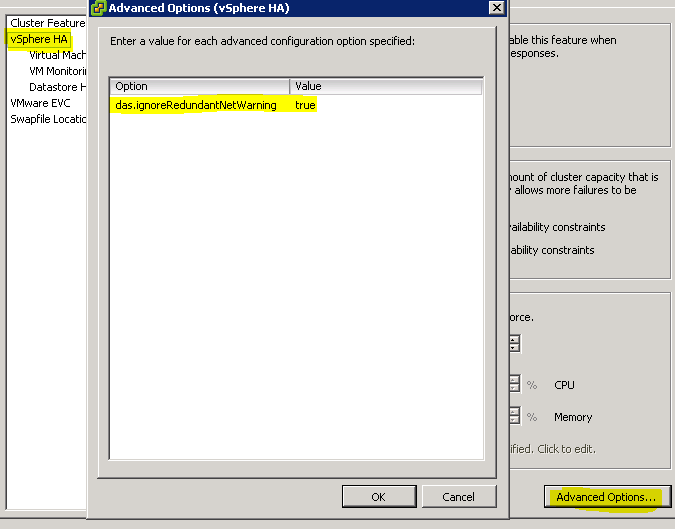
Click Ok twice, right the host with the error and select “Reconfigure for vSphere HA” and after a few moments the error should disappear.

VMware ESX/ESXi 4.1 host upgrade failed due to 3rd party updates
I’ve recently been running several ESX 4.1 to ESXi 5.1 Upgrades. Generally this is a much easier process due to the Update Manager now handling ESX/ESXi 4.+ Upgrades directly from the vCenter. That being said, I have ran into the following issue when running an upgrade:
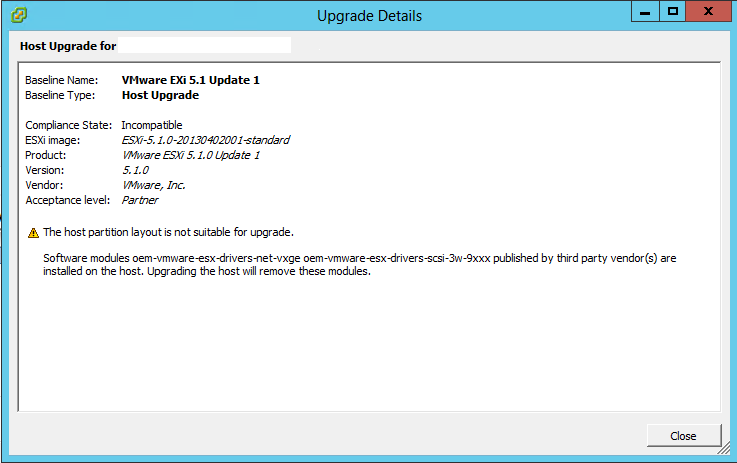
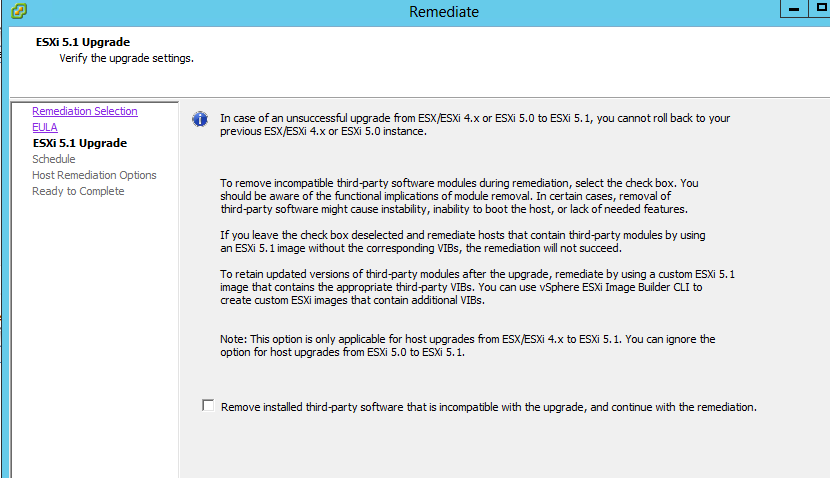
The majority of upgrade errors I have encountered are generally due to custom VIBs that are no longer compatible & can be bypassed by selecting the box for “Remove installed third-party software that is incompatible with the upgrade, and continue with the remediation.”
In this situation however, I’ve found you need to remove the problem patch before getting to this screen. The easiest way to perform this is by connecting via console or SSH to your ESX host and running the following command: “esxupdate query -a”.
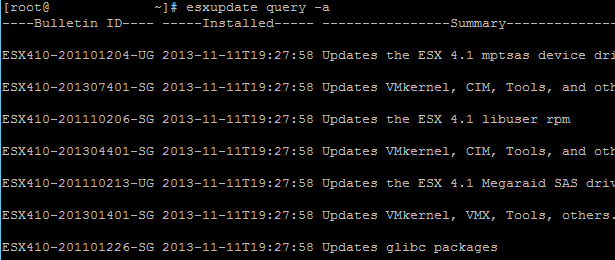
This will give you a list of installed updates. From here, find the problem patch – in my case ESX410-201101223-UG & ESXi410-201101224-UG & run the following command for each:
esxupdate -b ESX410-201101223-UG remove
esxupdate -b ESX410-201101224-UG remove
![]()
Reboot your host and continue your upgrade
Upload Fortigate MIBs to OpManager
If you would like to monitor your Fortigate firewalls with anything other than the basic interface lists, ping latency, etc. in ManageEngine’s OpManager then you will need to install the Fortigate MIB files. There are two sets of MIB files I needed for the Fortigates we were monitoring. One is FORTINET-CORE-MIB.mib which sits under the root of the support.fortinet.com firmware FTP.
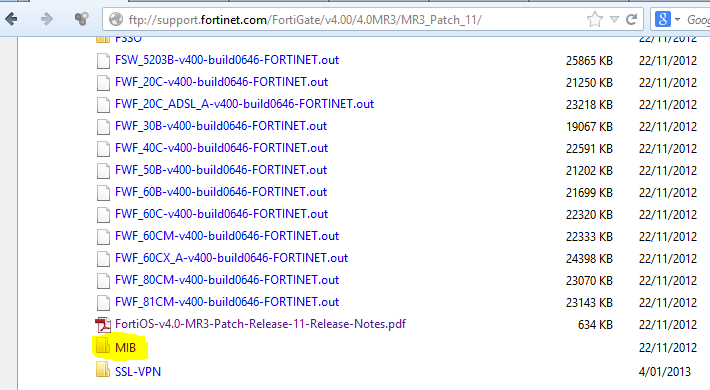
The other is located under the MIB folder on the same FTP portal under the specific patch of the Fortigate you are setting up.
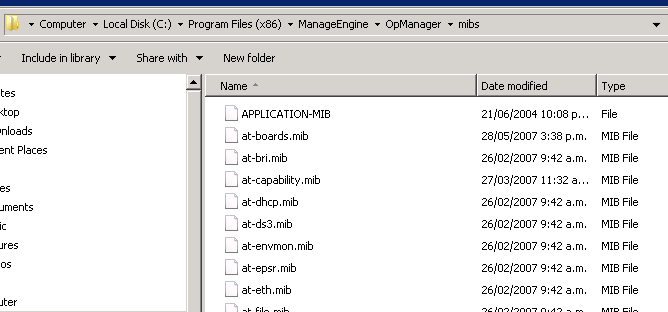
I noted several issues with corrupt copies of the default MIBs included with OpManager. Thankfully I was able to download replacements here: http://forums.manageengine.com/topic/opmanager-mib-repository-now-available-for-download-mibs-zip. The MIBS.zip file didn’t work but I was able to search for the specific corrupted files and download them to the OpManager MIB location in Explorer (C:\Program Files (x86)\ManageEngine\OpManager\mibs).
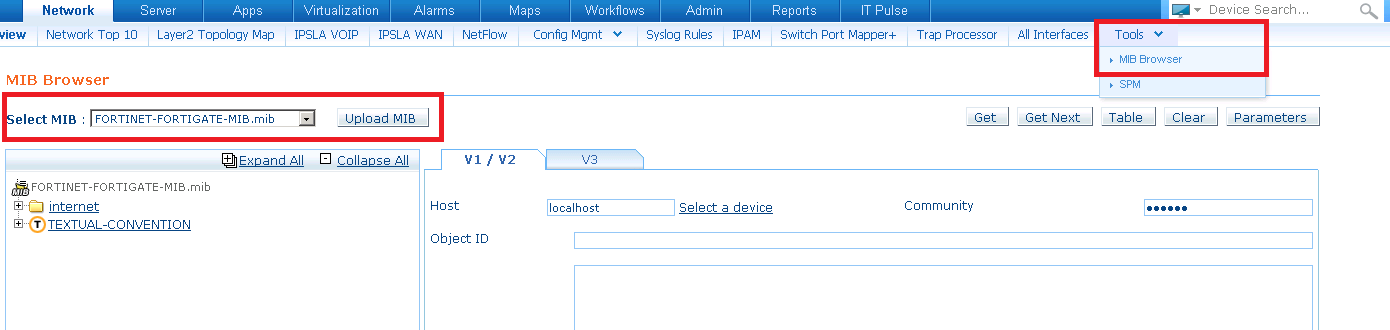
From there you can simply upload the MIBS via MIB Browser built into OpManager (Tools, MIB Browser).
Find HP Proliant serial number from Windows
I’ve had several instances when HP System Management isn’t operational and I don’t physically have access to a server to check its serial number. Thankfully this can be easily queried from windows by running the following command from a command prompt:
wmic bios get serialnumber
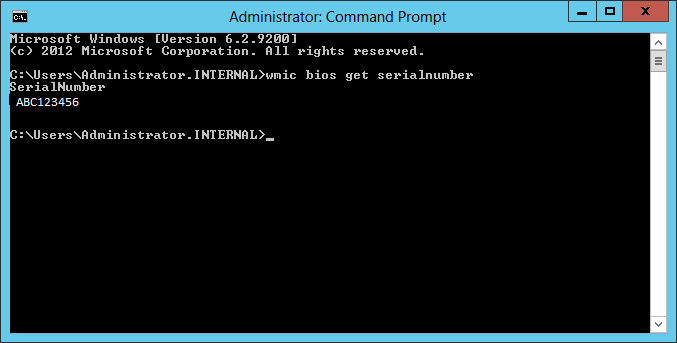
Note: This does work for other manufacturers – we are just primarily an HP house. 🙂
Windows Server 2008 R2 not showing all available free space and won’t extend
We recently had an alert come through regarding one of our customer’s data drives running out of space. I logged into to vCenter and extended the VM guest’s data drive, logged into Windows, ran DiskPart, selected the volume & extended it. This is generally my preferred method as more often than not it doesn’t show the space in Windows Explorer when the same process is ran from Disk Management.

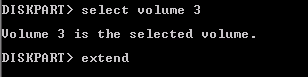
The extend showed that it completed successfully and all the available space showed up in Disk Management. However it still wasn’t showing in Windows, even after a restart of the server. Next thing I ran was extend filesystem on the selected volume. This came back with the following error: DiskPart has encountered an error: The device does not recognize the command. See the System Event Log for more information.
![]()
Researched the issue further and noticed that the Volume Shadow Copy Service was started, although there were not any scheduled Shadow Copies or Shadow Protect backups currently running. Stopped the service and re-ran the extend in Diskpart – this time it completed with no errors and the correct space was then shown in Windows.
![]()
vCenter Service & Hardware Status won’t display.
A couple of times now, I have ran into the following error with vCenter 5.1 loaded on Server 2003 x64 when opening up vCenter Plug-in Manager:
The following error occurred while downloading the script plugin from https://vcenterserver.domain.com:8443/health-ui/scriptConfig.xml. The client could not send a complete request to the server. (The underlying connection was closed: An unexpected error occurred on a send.)
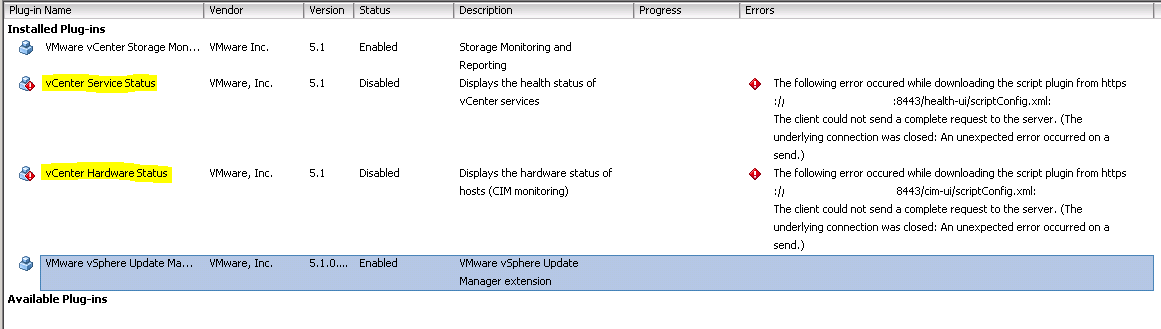
The issue in each case has been due to missing AES Cipher suites in Server 2003. Running the following Micrsoft Hotfix has resolved it in both cases: http://support.microsoft.com/kb/948963