SCCM 2012R2 Distribution Point Transfer/Setup Error: 0x80040154
While troubleshooting package transfer failures for a Distribution Point in a customer’s SCCM 2012R2 environment, I came across the following errors:
ExecStaticMethod failed (80040154) SMS_DistributionPoint, AddFile SMS_PACKAGE_TRANSFER_MANAGER 10/06/2016 2:18:13 a.m. 12632 (0x3158)
CSendFileAction::AddFile failed; 0x80040154 SMS_PACKAGE_TRANSFER_MANAGER 10/06/2016 2:18:13 a.m. 12632 (0x3158)
Failed to add the file ccmsetup.cab in content SKI00003.4. Error 0x80040154 SMS_PACKAGE_TRANSFER_MANAGER 10/06/2016 2:18:13 a.m. 12632 (0x3158)
CSendFileAction::AddFileMetaData failed; 0x80040154 SMS_PACKAGE_TRANSFER_MANAGER 10/06/2016 2:18:13 a.m. 12632 (0x3158)
CSendFileAction::SendFiles failed; 0x80040154 SMS_PACKAGE_TRANSFER_MANAGER 10/06/2016 2:18:13 a.m. 12632 (0x3158)
CSendFileAction::SendContent failed; 0x80040154 SMS_PACKAGE_TRANSFER_MANAGER 10/06/2016 2:18:13 a.m. 12632 (0x3158)

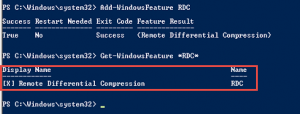
After researching the issues and checking installed components on the Distribution Point, I noticed that IIS had been manually configured and the RDC (Remote Differential Compression) feature wasn’t added to the server.
After installing this and triggering a distribution to this DP everything kicked into life.
MS Operations Management: Error 2013 Unable to register to Advisor Service
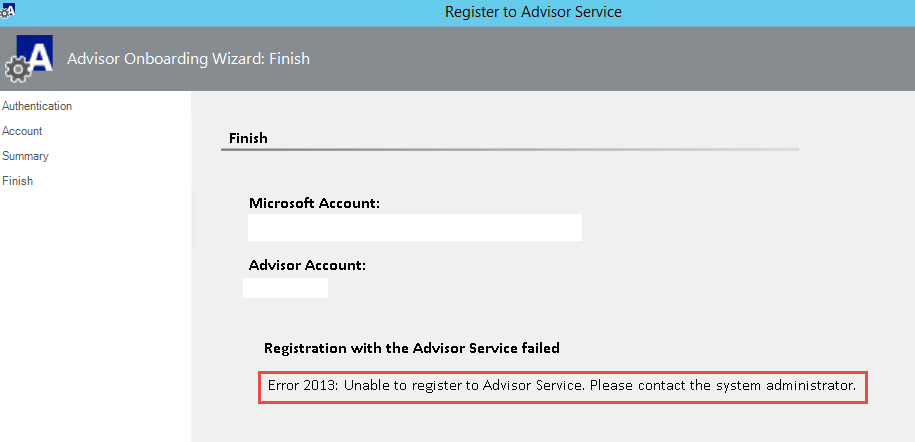
I was recently working with a customer to integrate Microsoft Operations Management Suite into their SCOM environment and noted they received the following error when connecting SCOM to MOMS:
Error 2013: Unable to register to Advisor Service. Please contact the system administrator.
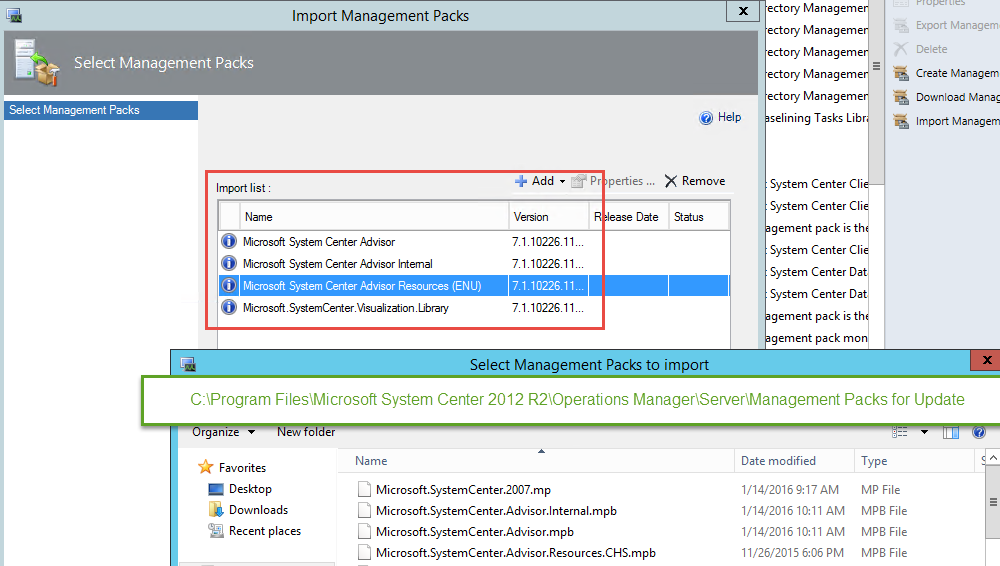
Thankfully this is a relatively simple fix. While they had upgraded their SCOM environment to the latest patch (UR9 at the time of this post), they had not imported the updated Management Packs (C:\Program Files\Microsoft System Center 2012 R2\Operations Manager\Server\Management Packs for Update Rollups) as part of the upgrade process. These Management Packs include the update to the old Advisor Server – now known as “Operations Management Suite.” Simply adding the new MP’s resolves the issue:
Azure Recovery Services “Invalid Vault Credentials”
I was recently setting up Azure Recovery Services for a customer and was struggling to install the Azure Vault Credentials during the “Register Server” step. Each time I would install I received the following error message:
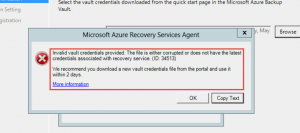
Invalid vault credentials provided. The file is either corrupted or does not have the latest credentials associated with recovery service. (ID: 34513)
We recommend you download a new vault credentials file from the portal and use it within 2 days.
I reviewed the Azure Recovery Services logs (C:\Program Files\Microsoft Azure Recovery Services Agent\Temp) and found some mostly generic .NET errors about being unable to communicate with the server. I attempted to connect via the Azure Backup PowerShell cmdlets which returned the following error:
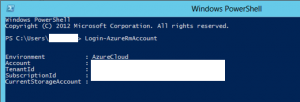
Login-AzureRmAccount : The browser based authentication dialog failed to complete. Reason: The request could not be processed by the server due to invalid syntax.
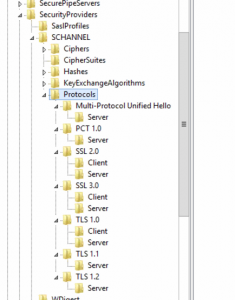
On a bit of a hunch, I looked into the Security Providers settings for the server to see if any client protocols and been adjusted and noticed that they had all been hardened and a lot of ciphers client ciphers were disabled beyond the defaults.
Path: HKEY_LOCAL_MACHINE\SYSTEM\CurrentControlSet\Control\SecurityProviders\SCHANNEL\Protocols
I compared these settings against another server and then removed all of the additional entries back to the defaults (after backing up the changes):
After that my Azure PowerShell connection worked perfectly:
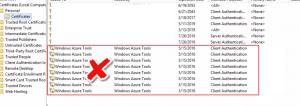
From there I had to remove all of the old machine certificates added through all of the failed attempts…
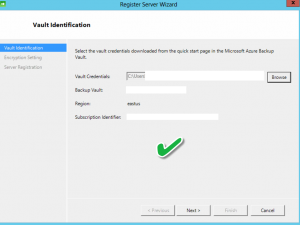
Finally a re-install of the agent and a re-register of the server completed successfully.
Find all HP Proliant Server Product Numbers/ID & Serial Number in Active Directory
I recently needed to find a way to look for all HP Proliant Servers in an organization for Warranty reporting. I put the following script together for this purpose. The script builds a Data Table, searches AD for all servers, confirms they are not a Virtual Machines & are Proliant servers, then runs a WMI query to pull the Product ID (and formats the output) & Serial Number into the ServerReport Table. This in turn is exported to a formatted CSV file. This can be plugged into something like this to expand further.
Here is the script:
#Please place the full path to your output file. Ie. C:\temp\myservers.csv
$FileOutputPath = “C:\temp\myservers.csv”
$ServerReport = new-object system.data.datatable “ServerReport”;
$ServerReport.columns.add((new-object system.data.datacolumn “ServerName”, ([string])));
$ServerReport.columns.add((new-object system.data.datacolumn “ServerSerial”, ([string])));
$ServerReport.columns.add((new-object system.data.datacolumn “ServerProduct”, ([string])));
$Serverlist = Get-ADComputer -Filter {OperatingSystem -Like “Windows *Server*”} -Property * | select-object -ExpandProperty Name
foreach($Server in $Serverlist){
$ComputerModel = (Get-WmiObject -Class Win32_ComputerSystem -ComputerName “$server” -ErrorAction Ignore | Select-Object Model).Model
if ($ComputerModel -match “Virtual Machine”) {
write-host “$Server is a Virtual Machine, moving to next Server”
}
if ($ComputerModel -like “*Proliant*”) {
$SerialNumberNoFormat = (Get-WmiObject -Class Win32_BIOS -ComputerName “$server” | Select-Object SerialNumber).SerialNumber
$SerialNumber = $SerialNumberNoFormat -replace “[^a-zA-Z0-9]”
$OEMStringArray = (Get-WmiObject -Class Win32_ComputerSystem -ComputerName “$server” | select -ExpandProperty OEMStringArray)
$ProductNumberNoFormat = $OEMStringArray -replace “[^0-9-]”
$ProductNumber = $ProductNumberNoFormat.Split(“;”,[System.StringSplitOptions]::RemoveEmptyEntries)
$row = $ServerReport.NewRow()
$row.”ServerName” = $Server
$row.”ServerSerial” = $SerialNumber
$row.”ServerProduct” = $ProductNumber
$ServerReport.Rows.Add($row)
write-host “$Server is an HP Proliant Server, Serial Number $SerialNumber & Product Number $ProductNumber are being added to file $FileOutputPath”
}
}
$ServerReport | Export-CSV -path $FileOutputPath -Append -NoTypeInformation
Hope it helps!
Increase managed FortiAP’s with Fortigate 100D (and other models) Firewalls
With each built-in wireless controller in the Fortigate firewalls there is a max number of supported AP’s. By default this number is halved when you use tunnel mode (ie. all controllers tunnel back to an interface/captive portal on the Fortigate 100d’s). If you are using a central Fortigate/Fortigate HA Cluster as your controller it can be quite easy to go over 32 supported AP’s. By default the 32 number is a hard limit(on the 100D, larger devices have larger limits), whether you are using tunnel mode or not. In order to disable tunnel mode on your AP, thereby doubling your managed AP’s this is the process:
From the Fortigate’s CLI edit the controller config, edit your specific AP by Serial Number
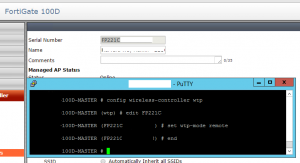
Type: “set wtp-mode remote” and type end. Now you should see the number of supported devices as increased:
Fortinet Guide: http://docs-legacy.fortinet.com/fos50hlp/50/index.html#page/FortiOS%205.0%20Help/wifi-ethernet_bridge.058.7.html
Veeam: Failed to prepare (Hyper-V) guests for volume snapshot
After a few big months (we recently moved back to the U.S. for a couple of years) – I thought I better get back to some blogging! Here is a recent issue I’ve ran into for a customer while setting up a new Veeam environment to backup a Hyper-V cluster:
Host and guest O/S both Server 2012 R2. When backing up a specific VM I received the following errors:
Unable to create snapshot (Microsoft CSV Shadow Copy Provider) (mode: Crash consistent). Details: Failed to prepare guests for volume snapshot.
Unable to create snapshot (Microsoft CSV Shadow Copy Provider) (mode: Crash consistent). Details: Failed to prepare guests for volume snapshot.
Processing servername Error: Failed to prepare guests for volume snapshot.
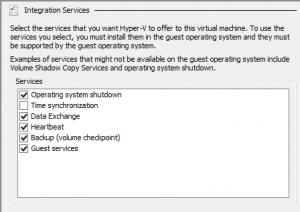
I checked the VSS Writers, etc. and confirmed they were all good. Checked to ensure there was snapshot space available. There was no need to upgrade the Integration services as suggested. After doing a little further digging, I noticed that the Hyper-V integration services components were set to disabled in the Guest O/S. This was in spite of the properties for the VM stating otherwise:
The fix was to set all of the services to manual (triggered start) & reboot the VM.
Once this was completed backup ran successfully!
Prepopulate Office 365 servers for Lync/Skype for Business Client
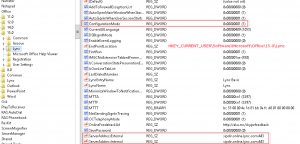
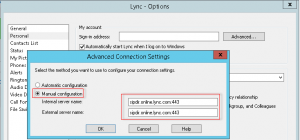
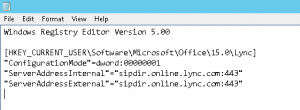
I’m currently working through a Lync cut-over for a customer to Office 365. As they are moving from a single on-premise Lync 2010 server and didn’t wish to go the hybrid route, we are running through a cut-over process for users. Ideally we would like to do this with no interruption to existing users (ie, updating DNS settings for all). As such, would like to manually configure the test users to point directly to Office 365 Lync Online/Skype for Business – preferably with as little hands on as possible. Thankfully, these settings can be configured in the registry. These registry keys to set can be found:
under HKEY_CURRENT_USER\Software\Microsoft\Office\15.0\Lync.
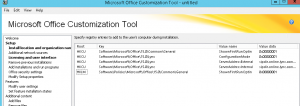
I am packaging these settings into the installer for SCCM deployment but this could easily be adjust using a GPO, script, etc.
Mass import IP Subnets into Fortigate firewall
Recently, while working through an Office 365 Hybrid migration for a customer, we needed to bring the Exchange Online Protection IP address ranges into their firewall for policy changes. Microsoft publishes this list here: https://technet.microsoft.com/en-us/library/dn163583%28v=exchg.150%29.aspx. Unfortunately, I needed them in the following format:
config firewall address
edit ExchangeOnline-23.103.144.0
set subnet 23.103.144.0/22
next
Thankfully, this was made much easier with using Word find/replace with the following syntax:
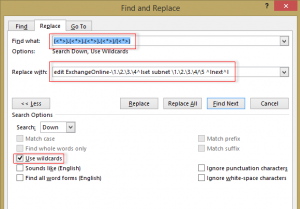
Find: (<*>).(<*>).(<*>).(<*>)/(<*>)
Replace: edit ExchangeOnline-\1.\2.\3.\4^lset subnet \1.\2.\3.\4/\5 ^lnext^l
Turns this:
23.103.132.0/22
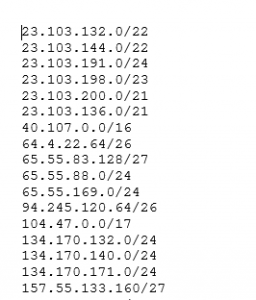
Into this:
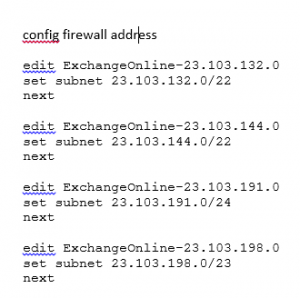
edit ExchangeOnline-23.103.132.0
set subnet 23.103.132.0/22
next
Simply copy and paste into SSH, upload script, etc. and you’re sorted!
ADFS/Office 365 SSO 80041034 Error
Recently after configuring Active Directory Federated Services for a customer for Azure AD Premium/Office 365, we received the following error while testing user login to https://portal.office.com:
Sorry, but we’re having trouble signing you in.
Please try again in a few minutes. If this doesn’t work, you might want to contact your admin and report the following error: 80041034
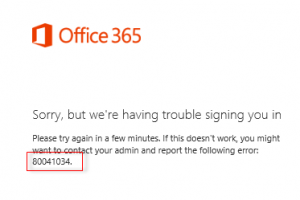
The obligatory Google search showed potential fixes relating to cached ADFS entries for users post-UPN changes (which we had done as a prereq. for MS Online Services). We ran the LsaLookupCacheMaxSize fix here: https://support.microsoft.com/en-us/kb/2535191. This did not resolve the issue. The other suggestions found online were to convert the MSOL Domain from Federated to Standard and back again. While I’m sure this would have helped, the easier option was to remove the Relying Party trust from ADFS:
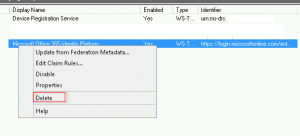
Followed by running the Update-MsolFederatioDomain -DomainName ourexternaldomain.co.nz
![]()
This then placed an updated/correct copy of the Relying Party trust into our ADFS server which resolved the issues!


